Getting Started
In this section, we will show you how to start using Busy Hour Messaging features.
Prerequisites�
- Busy Hour Account (Sign Up if you don't have one yet)
- Create a Busy Hour Project from the Dashboard/Projects
- Create a Busy Hour App from from the Dashboard/Apps
- Download Busy Hour App config file from from the Dashboard/Apps
Enabling Push Notifications
To enable Push Notifications in your app, you need to do the following:
- Create a Firebase Project through Firebase Console
- Enable Firebase Cloud Messaging through Firebase Console
- Download Firebase Admin SDK Private Key from Firebase Console by clicking "Generate new private key"
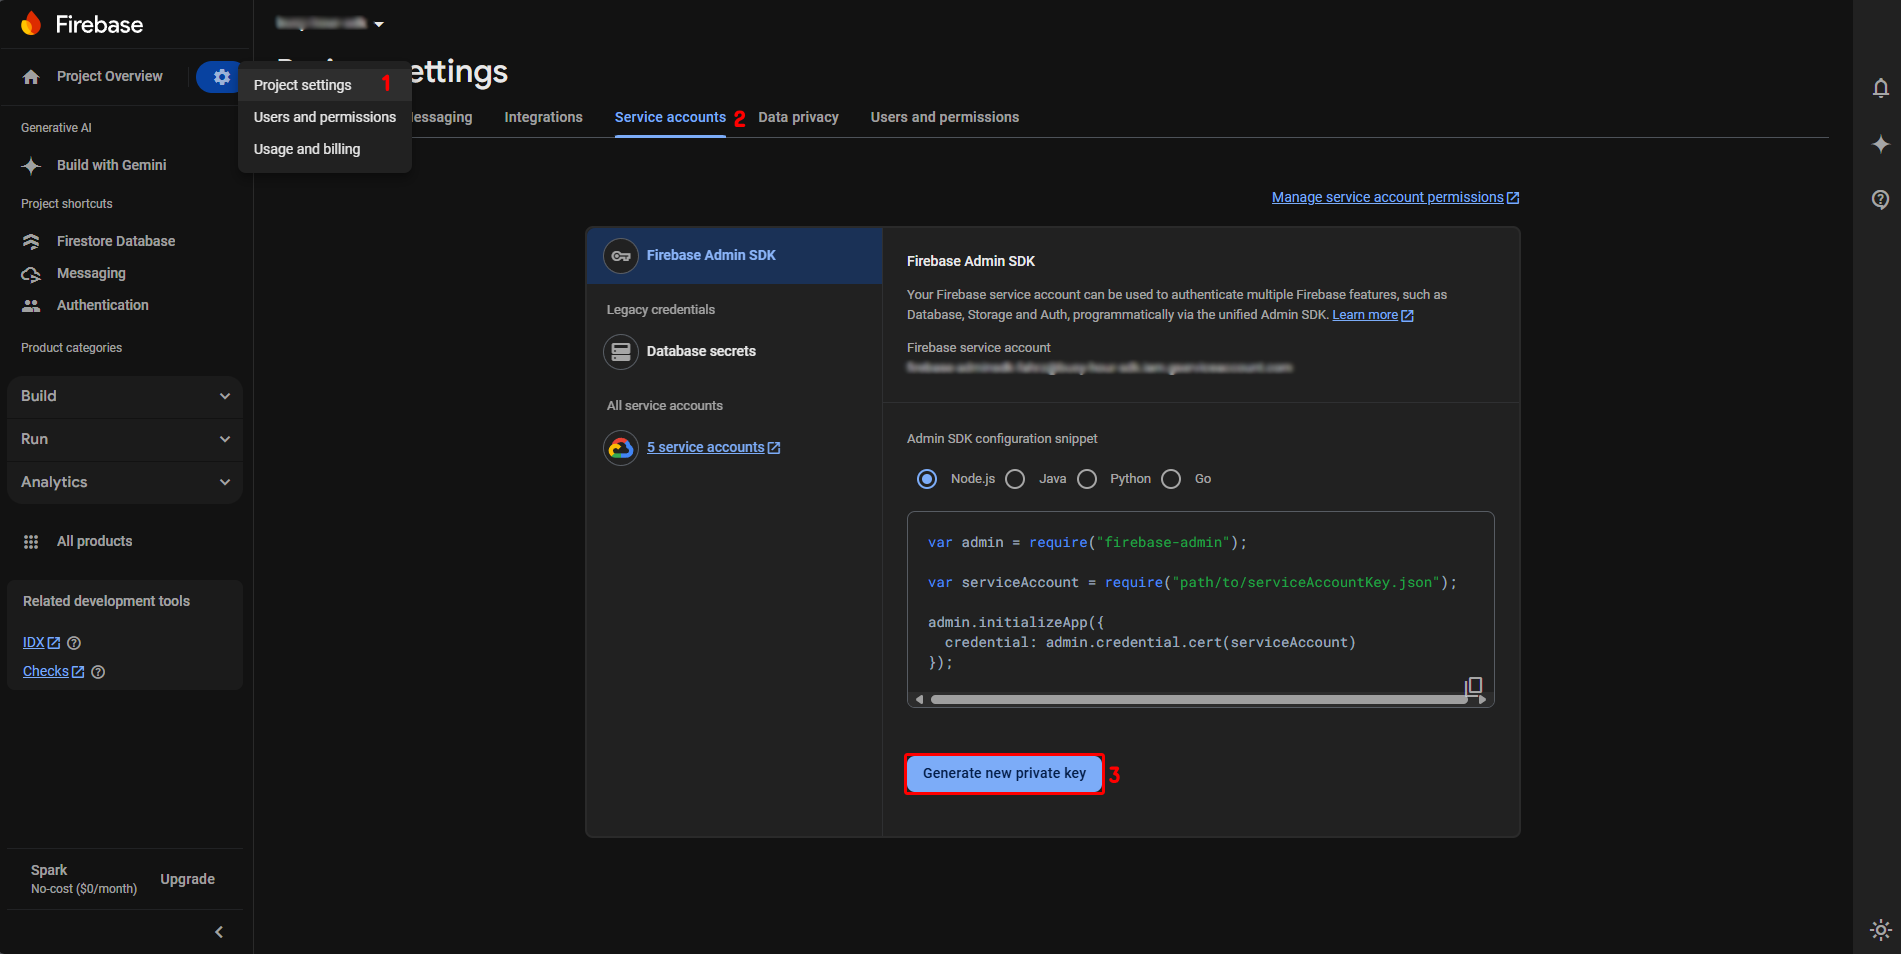
- Copy your Firebase Project Id, Client Email, and Private Key into your Busy Hour Project FCM Config.
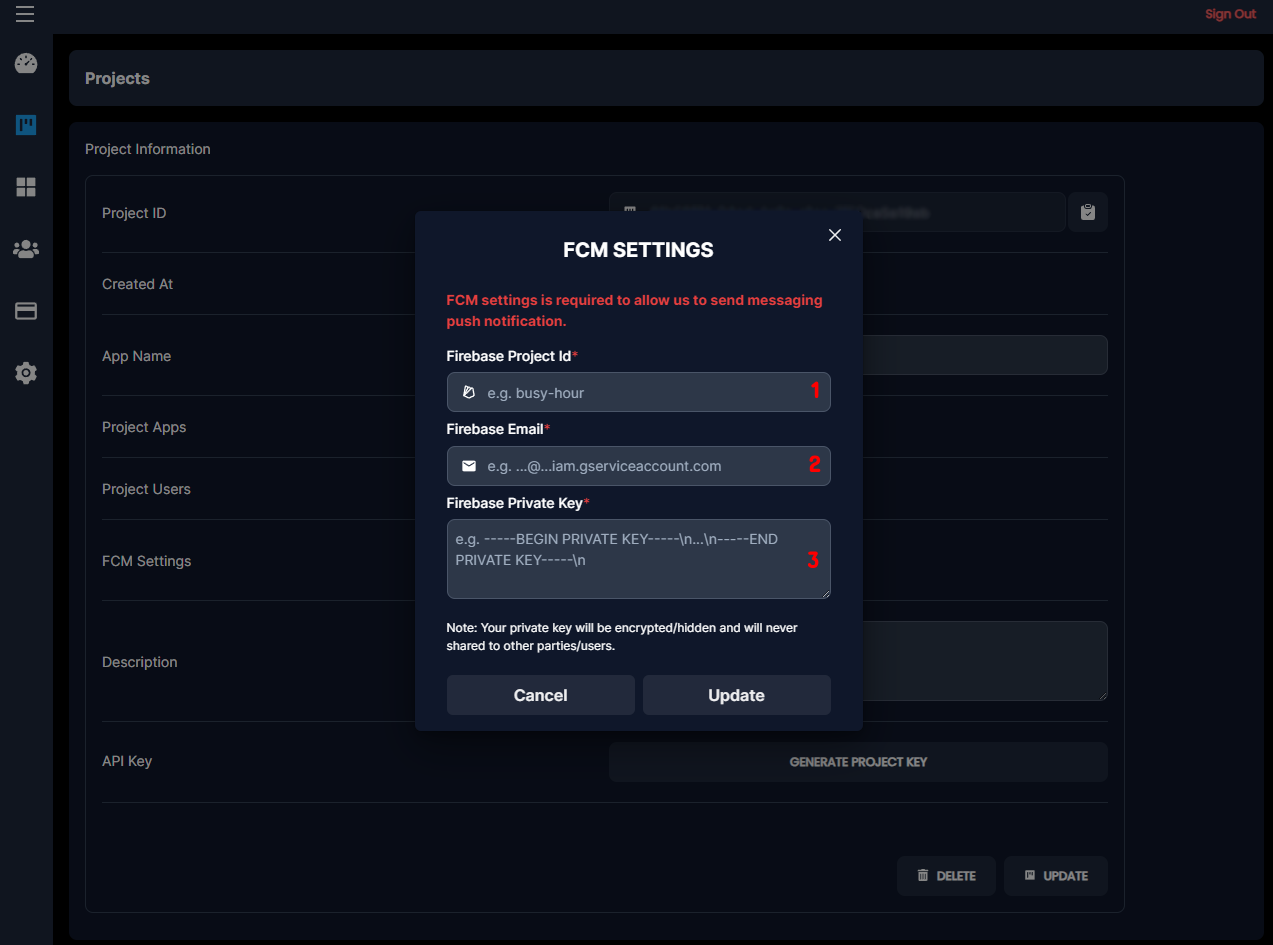
For more detail which field need to be filled with your Firebase Project Id, Client Email, and Private Key, please refer to the following table:
| Property | Type | Description |
|---|---|---|
| Project Id | string | The ID of the Firebase Project |
| Firebase Email | string | The Client Email of the Firebase Project |
| Private Key | string | The Private Key of the Firebase Project |
Storing Firebase Device Token
Once you have your Firebase Project Id, Client Email, and Private Key, are stored in your Busy Hour Project FCM Config. You can start by initializing your firebase app in your react project and get your device token. Once you have your device token, you can store it in our Busy Hour Server by using useSaveDeviceToken hook.
Quick Example
src/main.tsx
import React from 'react';
import { useSaveDeviceToken } from '@busy-hour/react';

export default Main() {
  const [isAppInitialized] = useInitBusyHour({
    // Initialize the app
  });

  useSaveDeviceToken({
    // Notify the hooks to save the device token
    isShouldSave: isAppInitialized,
    token: 'your-device-token',
    platform: 'web', // or 'android' or 'ios'
  });

  // ...rest of your code
}
What's Next?
After you have completed the above steps, you are ready to start using Busy Hour Messaging features.